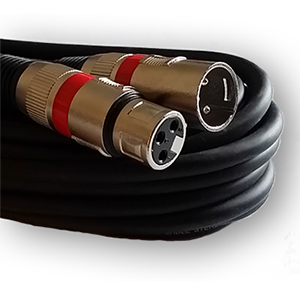
Compare XLR Microphone Cables from South Creek Audio
First lets take a look at their cables…
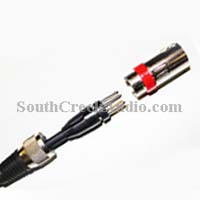
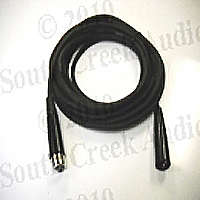 Here is a picture of a common XLR microphone cable we had purchased from an online auction. It is very similar in construction to most XLR microphone cables found in the $5.00 – $10.00 range. We’ve taken it apart piece by piece just to compare.
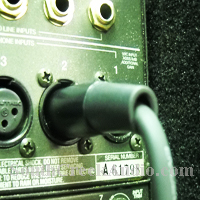
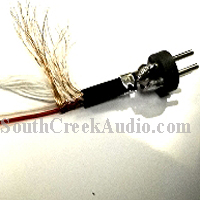
It was constructed with a standard 3 pin XLR connector on each end. Each connector consisted of a sleeve and strain relief that were attached to the tip with a screw. I’m sure you have seen this type before.
1. Loose strain relief
 The first thing we noticed and want to point out is the area where the cable wire enters the strain relief. Take notice of how loose the cable fits. A loose fitting connector will allow the cable wire to slide in and out putting unwanted stress on the soldered connections.
Remember, a broken wire in this area is the most common cause of an XLR microphone cable failing.
2. Thin metal brace
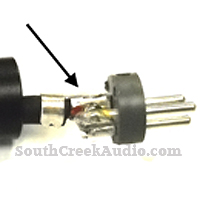 After removing the screw and sliding back the sleeve, the next thing you will see is a thin metal brace that crimps around the insulating jacket of the cable wire. This is meant to keep the wire from moving at the connector. On some connectors (like the one pictured) this can be made from a very thin gauge metal which can easily be bent out of shape allowing the wires to move back and forth against the soldered connection.
3. Spiral Shield
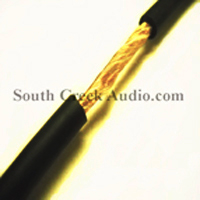 Next we’ve cut the cable wire itself and removed the outer protective insulating jacket. The first layer of wire you can see is called the shield. This is an extremely important part of a microphone cable and can drastically alter the performance of the cable. The shield wire can be either spiral-wrapped (which the microphone cable pictured is), braided or foil.
A spiral-wrapped shield is very flexible, lighter and cheaper to manufacture. It is also easier to terminate at the connectors. For these reasons, it is often used in microphone cable construction to keep the overall cost down. However, it is less effective at blocking unwanted RF signals because it has less coverage than either of the other two types. This is mainly due to the space between individual strands of wire that can develop as the cable wire flexes. Foil shielding, while providing the best coverage at 100%, by itself is not intended to be moved very much. Due to the low cost, it is mostly used for permanent installations.
Poorly manufactured braided shield
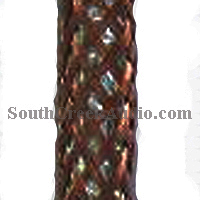 A Braided shield wire, when manufactured correctly, provides the best coverage. However, often this is not the case. This is a photo of a different microphone cable with a poorly manufactured braided shield wire. The braid is comprised of 64 strands of wire which have a very loose weave. This microphone cable manufacturer still advertises the cable as being a superior product.
Filler
 After unwrapping the shield wire the next layer you see is the filler. Usually made from cotton, its purpose is to add strength to the wire while filling the space between the core wires creating the round shape. You will see the center core wires once the cotton filler is removed. The two core wires (lower left) and the cotton filler (center left) are pictured in this photo.
Now take a look at South Creek Audio cables…
1. OFC Wire
 We use only OFC (Oxygen Free Copper) wire in our cables. With its conductivity rating at 97.6 percent that of pure silver it is the best choice. For example, aluminum has a conductivity of about 63 percent. To compensate for the greater resistance, many cable manufacturers choose a wire made with CCA (Copper Clad Aluminum). Every strand is actually made from a center core of aluminum and then coated with a thin layer of copper. Although it is a fraction of the cost, a cable made from CCA will still have about 34 percent greater resistance than a cable of the same gauge and construction made from OFC.
Copper Clad Steel (CCS) is also used by some manufacturers for the same reason. Not only does CCS wire also have a lower conductivity rating than OFC wire, but it is heavier and less flexible.
2. Properly constructed braided shield wire
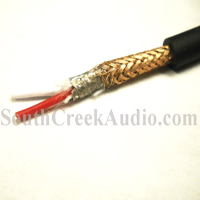 Compare this photo with the pictures above and you can see how the white cotton filler and inner core wires in this cable are completely covered by the shield. That is because our shield wire is comprised of 96 strands of braided .1mm OFC wire covering an inner layer of foil. By using this method of shielding, the interference can be greatly reduced while the strength and flexability remain intact.
3. Compression style connectors
 We use a compression style connector on our xlr microphone cables. After the wires are soldered, a tapered collar is placed around them. The inside of the rear half of the connector is also tapered. When the two halves are screwed together, the collar grips the cable and holds it secure before the soldered connections. Although there are other cables sold with this style of connector, the rear half is usually made from plastic. Again, the only benefit of plastic is to reduce the overall cost.
4. Custom cable ties
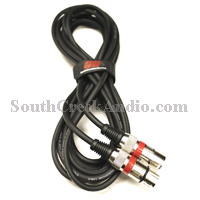 To keep each microphone cable neat and ready for use we wrap them with a custom heavy duty Velcro cable tie. Then every XLR cable is inspected and tested before being shipped. The final product is a cable we are proud to put our name on.
Click here to see what others have to say about our guitar cables, XLR microphone cables and patch cables. Answering your requests, we have expanded our inventory to include Patch Cables and Guitar Cables with 90 degree connectors. Along with our XLR to XLR Microphone Cables, we have also added XLR to TRS Microphone Cables.
If you have any questions, feel free to email us at ContactUs@SouthCreekAudio.com. We are always happy to hear from you!
Don’t forget to visit our page on Choosing The Best Guitar Cables to get some tips on which guitar cables may be right for you.